The Ultimate Guide To Your RV’s Wastewater Tanks: How It All Works, How To Dump Them, How To Clean Them, And More.
 Dumping the poop. Not exactly the sexiest part of that gorgeous RV vacation, but it is a necessary evil.
It can also be a potentially confusing thing to do for a new RV owner. Tanks, valves, hoses. Plus, just the thought of dealing with poop. 🙂
From the looks of it, there’s a lot of people searching for it online. Type “RV how to” into Google and look at the suggestions that come up and “dump tanks” is right up there. I was actually a bit surprised by that. After all, from my perspective, you just pull the lever and let ‘er flow.
But, there are things to know about dealing with your holding tanks. In fact, I did some research to compile what I hope will be a “ultimate guide” to your RV’s holding tanks. If there could be such a thing. 😉
Shall we begin?
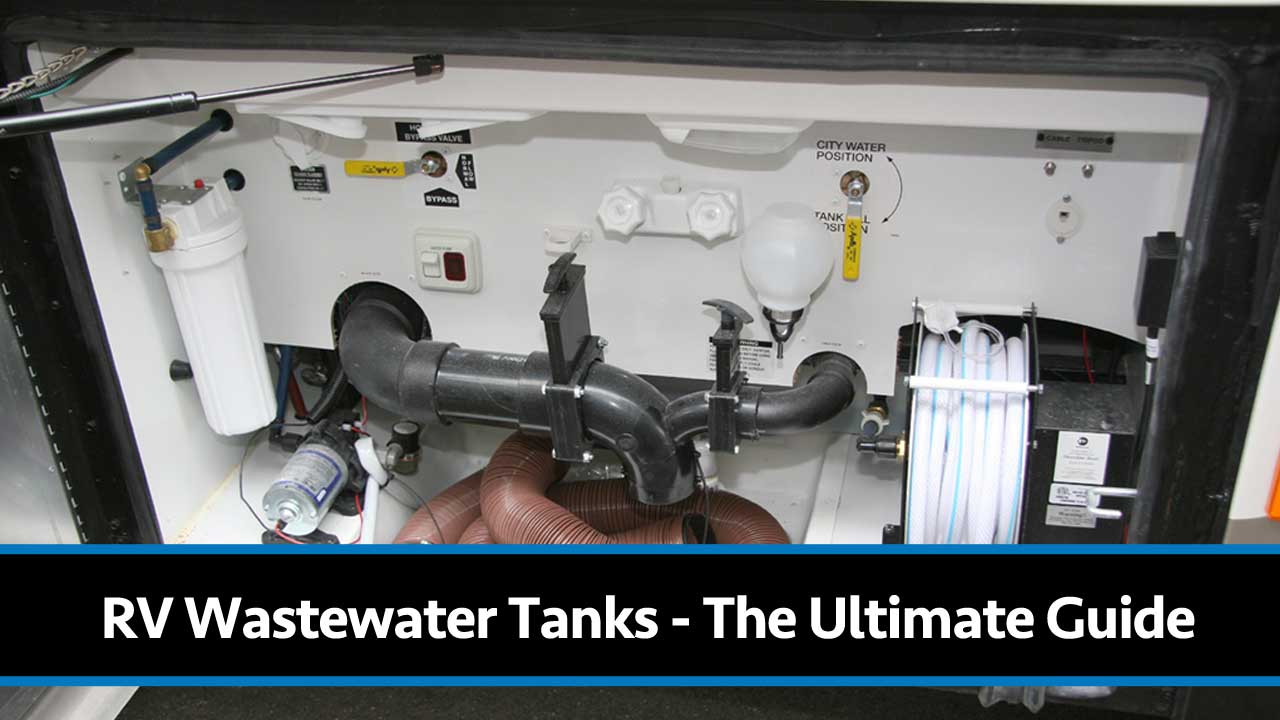
Holding Tank Basics
Your RV has two waste holding tank types:
- “Grey Water Tank” – This is your tank which holds water that went down your sinks and shower. Some RVs have two gray water tanks, however most have just one.
- “Black Water Tank” – This is the tank which gets what goes down the toilet.
Your RV also has a clean water tank for holding potable water, however we’re just focusing on the waste tanks right now.
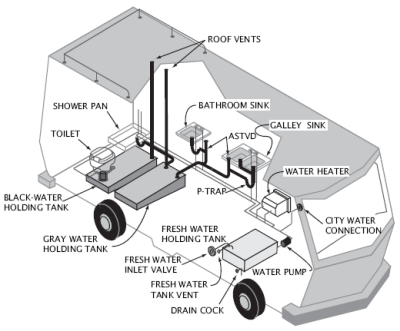
These 2 tanks are made out of a really tough plastic such as polyethylene and usually aren’t visible. They reside under the flooring of your RV. Some RVs have one or both tanks visible from beneath, but that isn’t always the case. For instance, my old Coachman was built so that I could see part of the two wastewater tanks inside one of the basement compartments. On my current Holiday Rambler, the tanks are located more toward the center of the rig and are much harder to see.
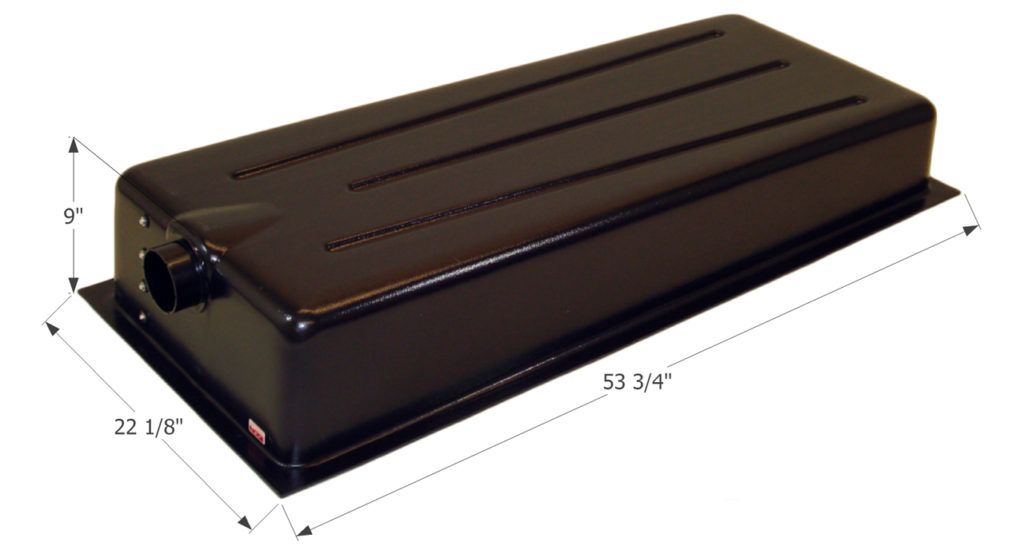
The size of the two tanks varies from RV to RV. Often the older rigs will have smaller tanks whereas many of the newer ones will have more capacity, but this pattern isn’t consistent. Tank size will depend on who built your rig. My rig has what I think are relatively small tanks, both at 42 gallons. Some newer rigs will give you gray tanks as large as 100 gallons.
Generally speaking, the larger your grey water tank the better. This tank almost always fills up faster. And there’s nothing more annoying than having to baby the water that goes down the sinks for fear of filling the tank before it is time to leave your campsite.
And yes, I have experienced my family filling up the gray tank and having the water slosh up into the shower drain. It starts with “Honey, what is that smell?” and turns into “Dammit!” 😉
RV Tank Sensors And How They Work (And Give False Readings)
Your RV will have a panel that allows you to get a reading on how full your tanks are. This is a pretty useful gauge seeing as there’s no way you would know without them.
Problem is, sometimes these sensors aren’t accurate. To explain why this happens, you should know how the sensors actually work.
On most RVs (and mine is one of them), the sensors are designed with probes in the tank placed at the sensor intervals you see on your gauge (often in thirds). So, your first sensor would be at the 1/3 full level, or possibly the 1/4 level. These probes are given a small DC electrical current. The idea is that when the stuff in the tank reaches that sensor, it will send signal back to your control board inside the RV so you can see the lights.
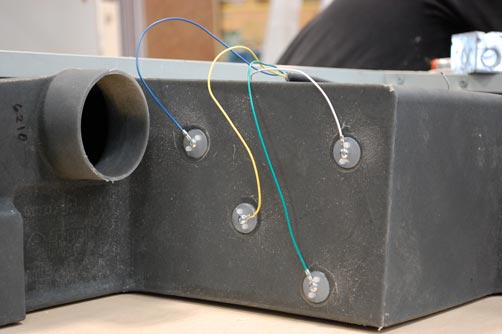
Problem is, there’s “gunk” inside your tank, too. This gunk can stick to the sides of the tank, wet with moisture. We all know that water can conduct an electrical current. So, this gunk can actually form a completed circuit between two of your sensor probes. The result is that you’ll get a false reading on your tank because the gunk is triggering a sensor that isn’t actually where the fluid level in your tank is.
It can also happen where the sensor probes are completely clean but you’ll still get false readings. In this case, there’s likely a fault with the control board. For example, in my rig, I had the waste water tanks professionally flushed shortly after I bought it. With the tanks clean as a whistle, I’d still sometimes get inaccurate readings. The likely culprit is the control board at the other end of those sensor wires.
We’ll go into how to clean your tanks and fix the sensor readings below, but first, we need to talk about what comes first and every time you leave a campsite…
How To Dump Your Waste Water Tanks
There are two locations where you can dump the tanks on your RV:
- At the official dump station in the campground you’re staying in.
- Right at your campsite if your site as full hookups (which means it includes a sewer connection).
Each of your tanks has a valve which turns on and off the drainage of that tank.
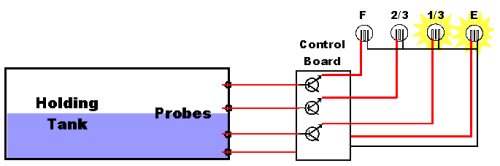
Most RVs will have one of two kinds of tank valves. The most common is the gate valve with a pull lever on it.
The other kind is the cable valve…
Both operate the same way, with a gate opening and closing the pipe. However, the method of operating that valve differs. The standard gate valve is much more fool-proof, in my experience. The cable operated valve can be a little… moody. Sometimes the cable will feel spongy, or worse, the cable will snap off. This requires valve replacement which isn’t an easy job.
Regardless of which type your RV has, the actual act of dumping the tanks is pretty straightforward.
- Pull up to the sewer connection so that the sewer compartment on your rig is close and the hose can reach.
- Get out and open up your compartment.
- Grab your sewer hose and attach one end to the valve connection on the RV and the other end stuck down the dump station hole in the ground.
- Pull the valve to drain the black tank. Always dump the black tank first. Allow it to drain completely.
- If your rig has a black tank flush connector, this is so that you can run clean water into the black tank and a built-in sprayer will clean the inside of the tank. Ideally, you will do this every time you dump, however I’ve skipped it before when I’m in a hurry. I would only do that if I know I’ll be using it the next day. I would never put the RV in storage with a nasty black tank. If your rig has this tank flush, connect the water to it and turn open the valve. You’ll hear the water spraying inside the tank.
- Allow all water to drain from the tank, then close the valve for the black tank and then open the one for the grey tank and allow it to drain.
- Once it is done draining, close the valve.
- Disconnect the sewer hose from the RV, leaving the other end in the ground.
- Grab the hose provided at the dump station and run water through the sewer hose to clean the inside. If you’re dumping at your campsite, you’ll need to use your own hose. Don’t use your drinking water hose here.
- Pull the sewer hose out and shake it out to get the water out.
- Put the sewer hose back into the RV compartment and clean up. If your rig stores the sewer hose in a special location (such as the rear bumper), then simply put it back.
- Be sure to put the sewer cap tightly back on the RV side to keep stuff from leaking into your compartment.
Here’s a short video I found from the Wynns to walk through the process:
Now, a few little tips and comments on the process:
Use your full hookup campsites to really do a thorough tank cleaning.
It is not uncommon to have the common dump station back up quite abit, especially when there’s a max exodus at the end of a weekend right around checkout time. For this reason, it is best to be respectful of the people behind and try to get your business done quickly.
I don’t usually like to do full tank flushes if I’m in a line. It can take several minutes. I prefer to take advantage of full hookup sites with a sewer connection to do these flushes. Worse case, the place I store my RV has a dump station I can use.
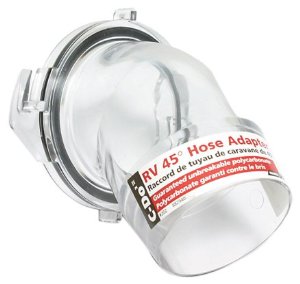
Use a clear elbow connector to get a good visual.
Without being able to see the inside of the tanks or your sewer hose, you’re left to your ear to tell if the tank is done draining. As an alternative, you can pick up a clear sewer tank elbow which you will connect between the RV hookup and your sewer hose. This will allow you to see what’s coming out of your tank.
Got valve leakage? You can attach a twist-on valve as a backup.
If you have cable operated valves on your rig, you can get a situation where they feel a little spongy and you don’t really know if they’re fully sealed when closed. If true, your tanks could actually leak their contents right into your compartment. Would be a mess.
You can pick up a twist-on valve (like this one from Camping World), twist it right onto your drain outlet, and it will serve as a solid backup. My rig has this installed and it works nicely. And yes, there’s always a little bit of fluid that that valve has stopped because the cable valves aren’t forming a perfect seal.
How To Connect To Sewer Hookups On A Full-Hookup Site
Full hookup campsites are convenient because you have your own dump station. Unlimited water! Yay!
But, if you do it wrong you can really clog up your tanks.
When I’m on a full hookup site, I connect the sewer hose but I leave the valves CLOSED. Why?
Realize that the contents of both tanks will have gunk. Your grey tank will have food particles, coffee grounds and other general nastiness. And your black tank will have sewage and toilet paper. Now, if you leave your valves open all the time, the fluid will drain out, but that gunk is going to likely just lay there on the floor of the tank.
It’ll dry out and become much tougher to clean later.
If you leave the valves closed and just dump on-site when the tanks are getting full, then that fast rush of the contents out of each tank will help bring most of that gunk out.
The most important tank to do this with is the black tank, however I usually leave the grey tank closed as well for the same reason. Plus, it allows me to use the grey tank fluid to wash down the black contents while dumping.
How To Flush Your Tanks
You most definitely want to clean the insides of your tanks – especially the black tank. When you simply pull the lever and drain, you’re most likely leaving chunks of toilet paper and waste inside the tank. And it can smell like sh*t, since that’s exactly what it is. 😉
As I mentioned earlier, if your RV has a built-in flush valve, it would be ideal to use it every time you dump. I sometimes skip this if there’s a line at the dump station and I’ll be camping in it again the next night. I would never put the RV in storage without flushing the tank.
 The secret to flushing your black tank is simply water flow. Throw a bunch of clean water through the tank and allow that flow to suck the contents right out the drain.
The two main ways to do that are:
- Using the built-in flush hose connector, feeding hose water into the tank from the outside and sending it out a little shower valve inside the tank.
- Opening up your toilet valve and simply letting the water run down the toilet for a minute or so.
If your rig doesn’t have a flush valve, you’ll need to use the toilet technique. Just let that toilet run while the black water valve is open and let ‘er rip.
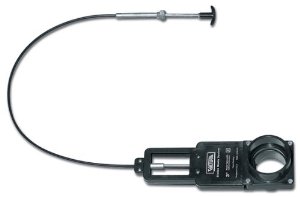
If you’re trying to do a deeper cleaning of the tank (perhaps to try to fix the inaccurate tank sensors mentioned above), then you’ll need to send a pressure sprayer into the tank. The most common type is the one that goes down the toilet. The design you use will depend on your rig.
- Master Blaster Tank Wand. This is for RVs where you have a straight pipe from the toilet into the black tank.
- Flexible Tank Wand. Exact same idea except this one is flexible, for RVs which have a bent pipe from the toilet to the tank.
Both of these are stuck down the toilet and you run hose water into it. Yes, this will require running a hose through the window and into your bathroom. Once it is on, you move the thing around and it sprays the sides of the tank with high water pressure. Definitely don’t screw up and open that valve without the wand down the toilet or you’re going to spray the inside of your RV with water like there’s no tomorrow.
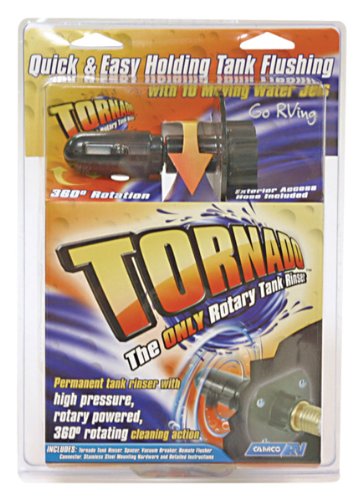
Now, if you don’t like the idea of running hoses into your RV, there are ways you can flush the tank from the outside. For instance, there’s the Tornado Tank Rinser, from Camco.
Here’s a good demonstration video showing a demo of what the insides of your tank could look like, plus a comparison of different ways of flushing out the tank…
How To Empty Your Tanks Without Moving Your Rig
What do you do when your tank fills up while you’re camping and you don’t have a full hookup campsite? Perhaps you’re only on a water/electric site or you’re boondocking.
It happens. And it is annoying. So, what are your options?
Well, one obvious one is to move the rig, run over to the dump station and empty the tanks. This is the most annoying solution unless you’re leaving anyway. Sometimes, it is your only option.
Another option is to carry a portable dump tank with you, like this one:
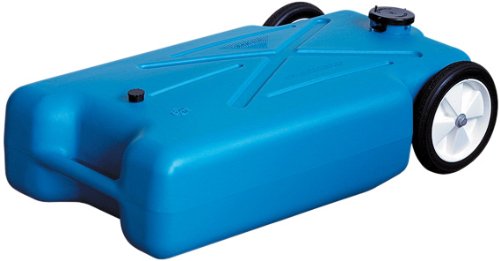
It is a tank with wheels. You dump from your RV into this tank, then wheel it over to the dump station. These tanks come in various capacities. Some have tow handles on them where you can attach it to the hitch on your tow vehicle to bring it over to the dump station.
Some campgrounds offer what is called “honey wagon” service, where they’ll bring a truck over to your site and dump the contents of your rig into their specially designed truck and haul it away for you.
A few kind souls have even looked around them and wondered… can I let just a little of the contents off here on the ground? Answer – NO. Definitely don’t let off any of your black tank on the ground. I mean, if you own the property and you really feel like it, go ahead but be prepared for a major stinkfest outside. In terms of your grey water tank, it is prohibited most anywhere to let anything out on the ground. In an absolute pinch, you could probably let off a little bit if you’re in a very rural place. After all, the grey tank is pretty much just sink water and is absolutely harmless. Your best bet is not to do it, though. Especially if you’re in an established campground.
The Tank Stinks! How To Make It Smell Better.
 Any closed space that you put poop is going to smell. I mean, it is what it is. So, you can only imagine what your black tank smells like. Or don’t. 😉
But, what you don’t want is to have that smell get out of the tank and back into your RV’s interior. If not cleaned properly, the smell from your black tank can make it’s way up through the toilet’s drain pipe and back up into the inside.
So, what do you do about it?
For one, keep the tank clean. See the info above about flushing it.
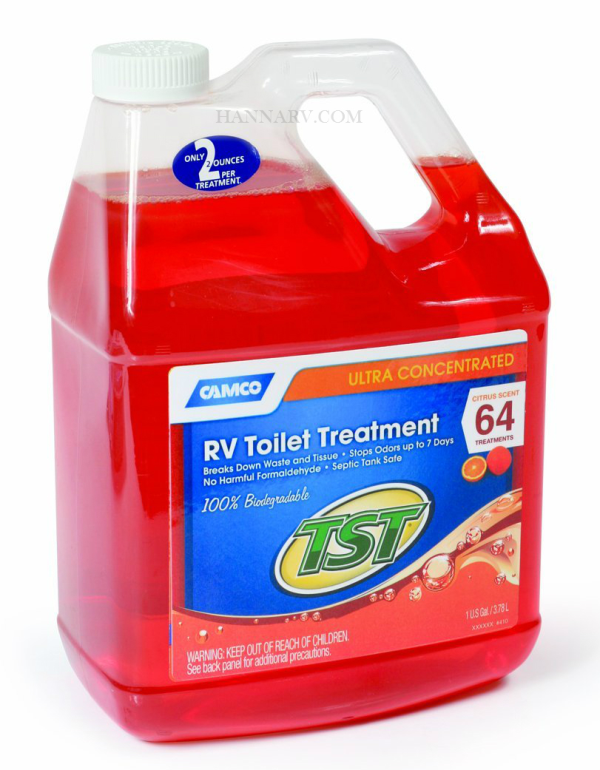
But, there are also chemicals you can use to treat the tank and get rid of odor. These chemicals work to break down the contents of the tank and deodorize them. They come in pellet form or liquid form. Take your pick.
Best bet is to throw some tank treatment, along with a few gallons of clean water, into your black tank every time you dump it. This will help keep your tank cleaner on the inside and… less stinky. 🙂
Do You Need That Fancy RV Toilet Paper?
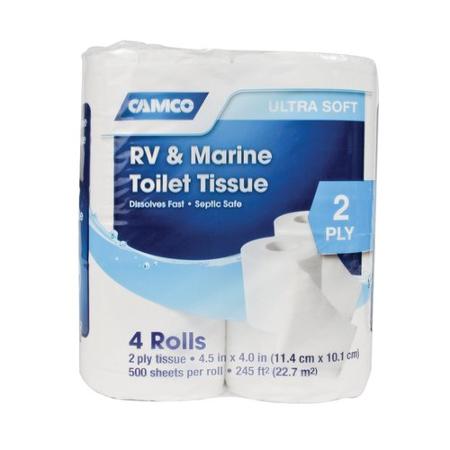 You go into any camping store and you’re going to see that they sell toilet paper specific to RVs.
Is this just a gimmick or is this something you should be using?
The short answer is… it isn’t a gimmick, however you still may not need to buy that stuff.
The issue is that you don’t want chunks of toilet paper just lingering inside the tank and sticking to stuff. Ideally, the toilet paper will dissolve and simply become a non-issue. RV toilet paper is designed to do exactly that. Once it goes into the tank, before too long it will simply dissolve.
But, will your standard household toilet paper do the same thing?
In many cases, yes. Most conventional toilet paper will dissolve in much the same way. One simple test you could run would be to stick a few squares of your household TP into a jar of water, shake it up for a few seconds and see if the paper begins to dissolve. It won’t disappear, but if you can clearly see that it is beginning to fall apart after a few seconds of shaking, then chances are your household TP will be fine for your RV.
Make sure any conventional TP you buy says that it is septic-tank safe.
So, if you want to be absolutely sure, you can spend the extra money on that fancy RV toilet paper. Most likely, however, your standard stuff you use at home will do just fine.
Don’t Ignore The Grey Tank
All this talk about the poop tank and we can’t ignore the other tank, too. It might not be bodily waste, but the grey tank still can get gunk on the inside and needs to be cleaned periodically as well.
It begins with controlling what goes down the drains. You should try to avoid putting this stuff down your drains:
- Grease or oil
- Chemicals and solvents
- Food scraps
It can be tough. After all, chances are your RV doesn’t have a dishwasher or a disposal. You can’t be nearly as liberal with that stuff as you do at home.
First off, put a drain screen in your sink. This will catch big food particles and keep it from going down.
Secondly, if you cook and have grease or oil left in the pans, don’t dump it down the sink. Dump it in the trash can… or even outside if you’re in a location where you can do that. Use paper towels to clean that stuff off your pots and pans before you wash them in the sink.
Dump your food leavenings and coffee grounds in the trash, not your sink.
Lastly, you may want to periodically flush your gray tank as well. You can put a little bit of water softener down the drain, or even a half-cup of bleach… along with a ton of flowing water. Then drain and re-fill and repeat until the water coming out of the tank looks clear.
Wrapping It Up
When you were envisioning all those awesome thoughts about RV travel, I doubt messing with the stinky’s was a big part of the equation. But, you gotta do it.
This guide covers the basics. Hope it helps. 🙂