Reflooring The RV: Installing Luxury Vinyl Planks
Reader’s Note: It has been over a month since my last update on my reflooring project. I had a few people email me asking what happened. 🙂 I had to rush a bit to finish the job for a camping reservation, so I ended up busting it out without worrying too much about recording videos. I am now going to bring the blog up to speed. The project is actually now pretty much completed. Yay! But, now, I will follow through on showing how the rest of it went.
=========
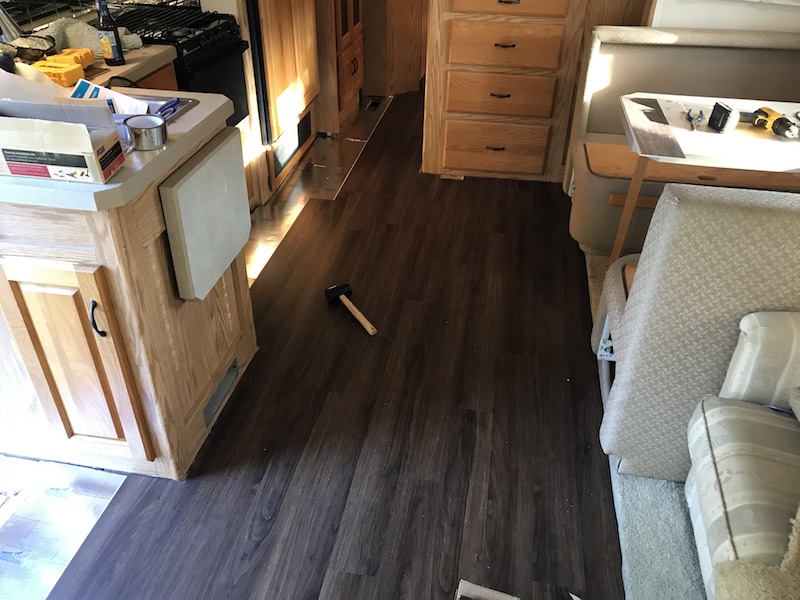
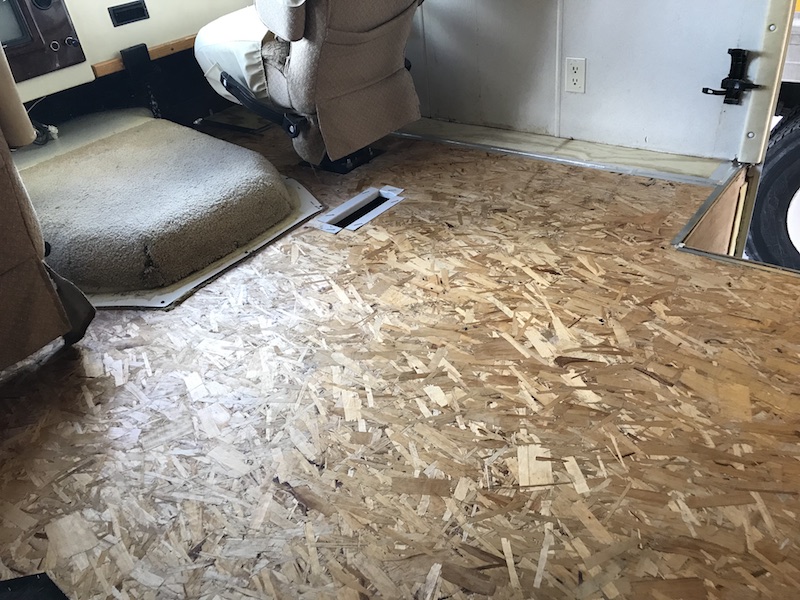
After removing the nasty carpet, removing the laminate and repairing the subfloor rot, it was time to put in the new floor.
I decided to use Smartcore luxury vinyl planks from Lowes. We elected to use the Tahitian Walnut finish. Unfortunately, this was a special order product, so we ended up waiting about a week and a half for it to arrive.
In the meantime, I took care of some other maintenance items, such as the washer/dryer reinforcement and fixing the cruise control.
I also took the extra step of sealing the subfloor with polyurethane. The purpose is to waterproof the subfloor and help ensure there’s less chance of any rot issues taking place again. I put down two coats.
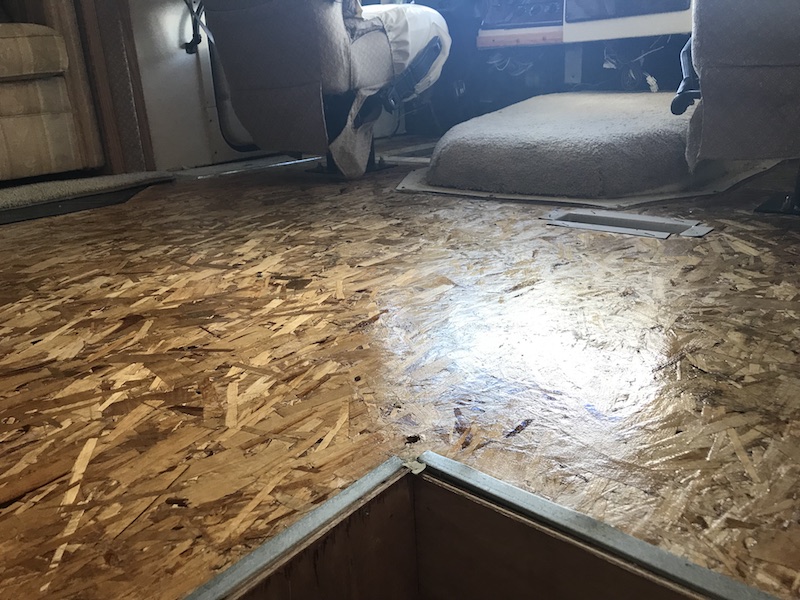
I just picked up 2 quarts of the stuff and slapped it onto the whole subfloor. You don’t have to be careful with it as you’re not going to see it after the new flooring is in. It goes on shiny then dulls out as it dries.
When I finally got the planks in, it was time to make things happen!
The tools I used were:
- Miter saw
- Jigsaw
- Rubber mallet
- Tape measure
- Pencil (for marking cut lines)
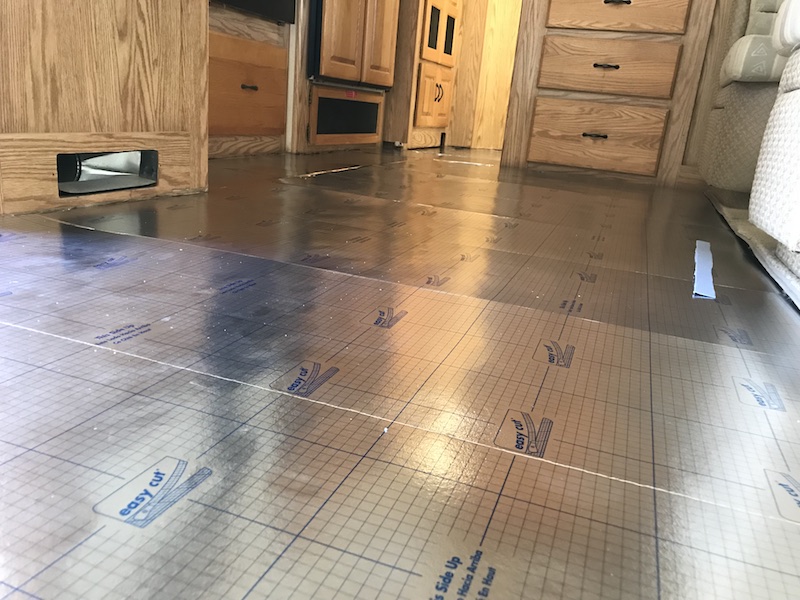
The first thing I did was install an underlayment. I used FloorComfort. This stuff is easy since it lays flat. Just cut to fit and use the underlayment tape to seal the seams.
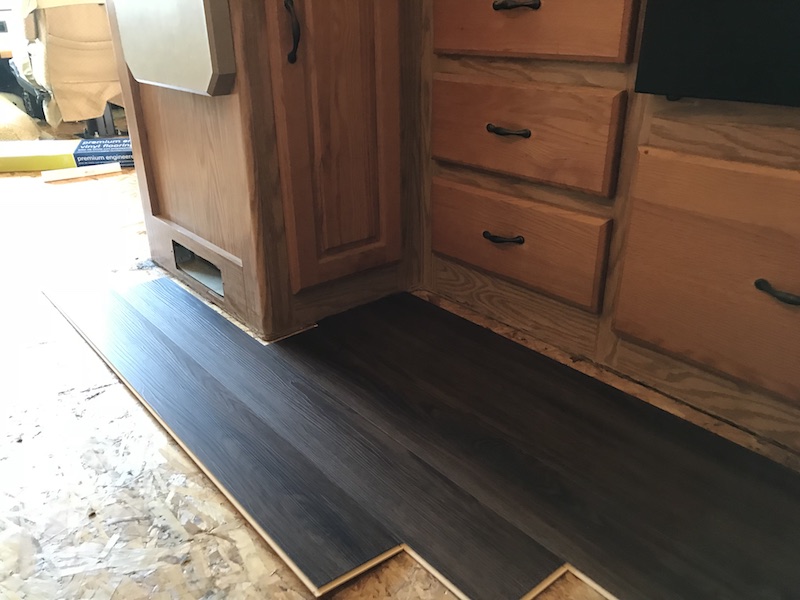
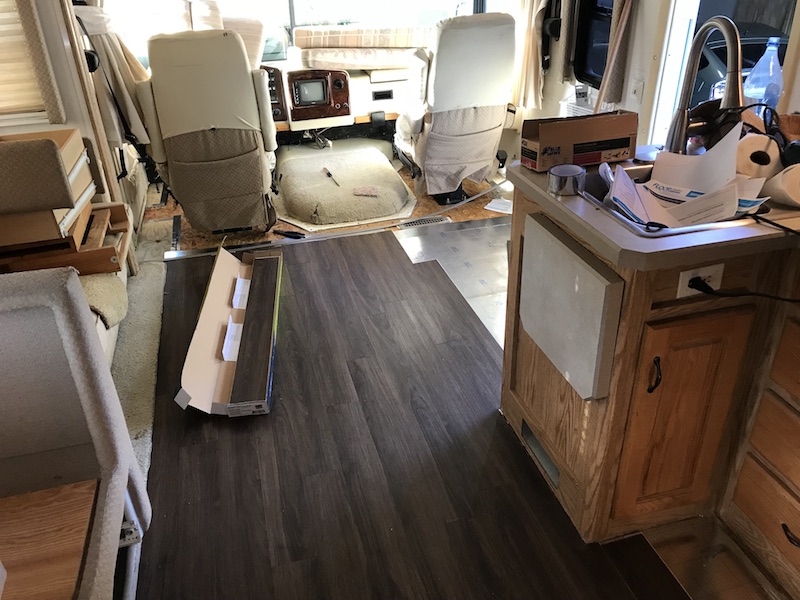
Installing vinyl planks isn’t rocket science. I started next to the large slideout since this was the longest wall. Using the tounge-and-groove system, the planks lock together.
I started first with the first couple rows of planks next to the slideout. I then tested the movement of the slideout and adjusted the planks accordingly. See, the slideout moves in and out and it can mess with the flooring. My slideout raises as it comes in, fortunately. I investigated what was happening and determined that the slide would float just above the new flooring and not cause any issue.
SIDE NOTE: I was actually wrong about this and ended up having an issue with the slideout scratching the new flooring. More on this in a future post. 🙂
Even though this is rather simple floor to install, it always comes with complications. For one, sometimes getting the tounge-and-groove to lock took some doing. I’d need to re-insert it a few times. Also, I used my rubber mallet several times to knock things into place.
Also, an RV has way more angles, nooks and crannies than your typical room at home. I’ve installed this flooring in my home office and it was far more straightforward. The RV had me doing quite a bit of measuring and sawing to manipulate planks into small spaces, around cabinetry, around heater vents, around everything.
I also had several pieces of plank which ended up being pretty small. There was so little tounge-and-groove locking things in place that the flooring was almost just sitting there. For these pieces, I went ahead and used adhesive to keep things down.
I proceeded with this until the job was done. I didn’t get it all done in one day, however, which is why the video above doesn’t show the entire thing.
In the next video, I’ll show the finished product.
Could you follow up on your post about the issue with your slideout scratching the floor issue?
We still use those slide-out slickers. They’re a bit of a pain, and we do have a few scratches on the floor now. But, it isn’t bad. And, I also keep spare planks, so if I ever need to replace a few, it isn’t that big a deal.
What did you use on the edge of the slide out for the finished look
My slideout still has carpet on it, so we’re not looking at the edge of the planks.
I am wonering how you secured the flooring edge where the slidout came in and rose up. There is a straight edge there at the middle of your RV where you can’t use quarter round to hold down because you are literally in the middle of your floor. That is perplexing me. Do you face nail it with a nail gun? If it does not get fastened down you are liable to kick it up walking by. Thanks for doing this article, I am just starting the process of deciding.
Jim
They make edging for vinyl planking that is “J” shaped tht will nail under first or last plank . Whatever your situation. Then the plank slides into it , like the “j“ channel on vinyl siding.