Reflooring the RV: The Completion!
In the final video in this series on reflooring the RV, we bring the project to a close.
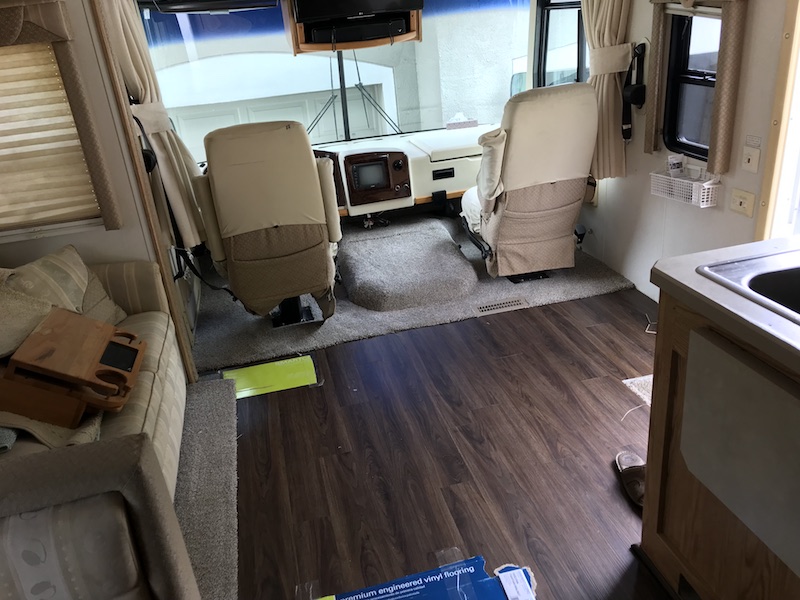
After installing the carpeting, I still had some things to do to wrap things up. Namely…
- Install quarter round trim around the edges of the vinyl plank flooring.
- Install transition pieces at the end of the carpet
- Re-install the cupholder and the table up front.
Installing the quarter round was… interesting.
First off, the luxury vinyl planks I used were from Smartcore and purchased at Lowes. However the exact match quarter-round was expensive (about $20 for 8 feet) AND another special order process. It took me a week and a half to get my flooring from Lowes and I did NOT want to put that kind of delay into things again.
So, what I ended up doing was buying a laminate quarter-round which was almost an exact match. I bought it at Home Depot and it was only about $6 for an 8-foot stick.
The other complication is simply the amount of angles and interesting cuts you’ve got to make in an RV. I’ve done quarter-round before in a square room of my house. That is child’s play compared with doing it in a motorhome!
But, I pulled out the miter saw and my air nailer and went to it. I nailed horizontally into the wall, not the floor. This way it would allow the floor to float as designed.
It wasn’t the perfect job. I’m not a professional carpenter or anything! There were a couple spots with a minor gap on the corner. I simply picked up a little tube of dark wood putty from Home Depot. I used this to bridge a few gaps as well as to cover the nail holes.
Next up was the carpet transitions. I picked them up at Lowes. Install is simple. Cut to length with a hacksaw and then screw them down.
The stairwell at the entry door was the toughest part since I had to cut several pieces at angles to frame in the stairwell. When all said and done, I got the job done. It’s a bit imperfect, but you’d never notice unless you got down there and looked at it up close.
Lastly, I had to re-install the cupholder and the table behind the passenger seat. However, I had to make adjustments. 🙂
See, the new flooring was much thicker than the old stuff. Especially with that additional layer of sound dampening material I had installed. So, the cupholder simply wouldn’t fit!
My solution was to modify it. I determined that if the cup holder was half-inch shorter, it would slip right in. So that’s what I did – shortened it. 🙂 I did a little disassembly, made some cuts with my saw, then put it back together. It slipped right in there and looks original again.
As for the table behind the seat, there was now a height difference in the floor beneath the table. The carpet was higher than the plank flooring. Plus, there was this transition strip under there. The result was that the table didn’t sit flat.
However, if I added a layer of wood on the low side, I could make it sit there beautifully. So, I took a piece of the wood from the cupholder and installed it on the bottom of the table. After that, the table went right in.
See, you have to be a problem solver when you do jobs like this! 🙂
The video above shows the completed product.
At this point, the only things left to do are:
- Install the carpet binding on the slideout carpet. I’m waiting until I install the new furniture to do this, though.
- Replace the carpet under the toilet. Honestly, though, not in a big hurry.
But, the job is now completed!
I’ll summarize the costs and the time and how it all worked out in another post. 🙂