Reflooring: Day 1 Of Pulling The Old, Nasty Carpet

So, the job on hand right now is reflooring the motorhome. And that starts with pulling up the old carpet.
As I mentioned in my last post, our motorhome is a 2002. And after 16 years, you can imagine what the carpet looked like. 🙂 Yeah, it wasn’t good.
So, starting in the back bedroom, I went to town pulling out the carpet and padding.
It’s a fairly easy job, although you will be huffing and puffing a bit. Take a utility knife with a nice, sharp blade and begin cutting the carpet around the edges.
When these motorhomes were built, they put down the flooring before they installed the contents. This means that all the cabinets and even walls were put in AFTER the flooring. For this reason, you will find that the carpet goes beneath cabinets, walls, etc. If you’re perfectionist, that might bother you. But, trust me, the easiest way to go is simply to cut the carpet at the edge of the cabinet. Leave the old stuff in there.
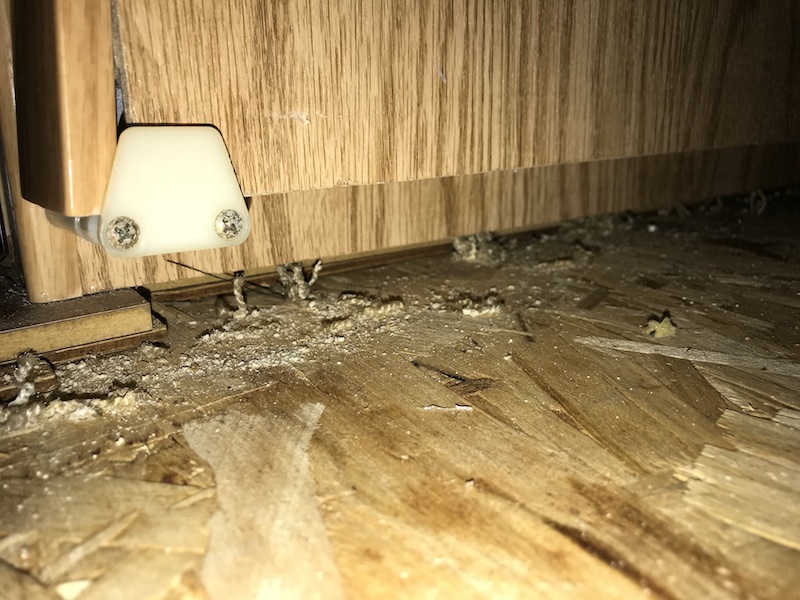
So, using the utility knife, I cut around the edges. Along the cabinets and walls. I then took a set of pliers in order to get a good grip, grabbed the carpet, and yanked like there’s no tomorrow. It comes up rather easily.
One little gotcha is the slideout. Like a lot of rigs, we have our bed sitting on a slide. That bed moves in and out. And yep, just like the cabinets, the carpet goes underneath the slideout.
Now, if I were hiring a service shop to do this job for me, they would probably either remove the slideout to get under there – or they would loosen it and raise it up enough to be able to remove that carpet. However, I’m not about to do that. So, my plan is simply to use the utility knife to cut around the edge of the bed. I will be leaving the old carpet under there. I’ll remove as much as I can. When I install the new carpet, I’ll slip it a bit under the bed and staple it down over the lip of the old carpet and you won’t even be able to tell the old stuff is down there.
One last thing…
Keep the old carpet on hand temporarily. I’m keeping it so as to use it as a template to cut the new carpet to the proper shape for the room and save me some time.
That’s about it. Pretty simple stuff.
I’ll tell you one thing… when you get that old carpet out into the sunlight, you realize why you’re replacing it. It looks like HELL.

From here, I’ll be removing the rest of that carpet and then tackling that laminate flooring. At this point in the process, I was still evaluating how that laminate was put down. My concern was that if it was using a lot of adhesive, then pulling it up would be a LOT of work. On the other hand, if it was mostly floating it wouldn’t be too big a deal.
You’ll see later how that turned out… 😉