Reflooring: Repairing Subfloor Rot – Part 2 (And Done!)
In the last installment, I covered my process for removing and repairing the sections of rotted subfloor. So, the next day, I went ahead and finished the job.
My goal was to complete all subfloor prep and have the rig ready to accept the new flooring.
So, the first thing I did was to finish cutting out the rot spots and replacing them all with new material.
Now, there were a few spots on the subfloor which were discolored or where some rot had begun, yet the wood still maintained structural integrity. In these cases, I decided to make my life easier and NOT remove it. Instead, I chose to strengthen it up with some rot treatment.
For the sake of access and simplicity, I simply used some Elmer’s Rotted Wood Stabilizer. In my case, it was in stock at Lowes so that made it easy for me. 🙂
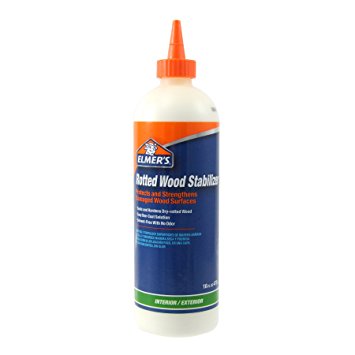
I treated those spots with the Elmer’s. Honestly, there may be better products out there, but this seemed to do the job for me. As I said, the wood wasn’t too bad so it didn’t take much.
The one questionable spot is still around the toilet. For now, I’m electing to NOT remove that wood and instead treat it. I think it’ll be OK, although I will make the final verdict when it comes time for me to remove the toilet so that I can replace the carpet under it. At that time, if it looks like the rot is more extensive underneath the toilet platform, I’ll probably go ahead and cut it out and replace it.
With the subflooring done, I went ahead and removed a few additional spots of previous carpet. The carpet on the rear bed platform was an absolute chore to remove! But, I got it.
Before I ended off for the day to put the rig back in storage, I went ahead and cleaned up everything. I don’t like to let the mess get too out of hand. With the rig having turned into a construction site, there was sawdust all over everything. So, I vacuumed and cleaned everything and re-attached items that were no longer in the way. More or less, the rig looks like it is ready to go camping, just without any flooring. 😉
Now, there’s one remaining item that I didn’t show on video because I did it later. And that was leveling out the new subfloor pieces as well as sealing it.
See, when I put in the new pieces, there were some spots where the new piece was a little higher than the old material. Most likely, it wouldn’t be noticeable after the new flooring goes over it, but it’d be ideal to level it. Also, I want to seal the seams (the crack between the new and old material) so water can’t get in there.
I was leery about putting screws through the floor because I didn’t want to puncture anything. So, I decided to instead pick up some simple brackets from Lowes…
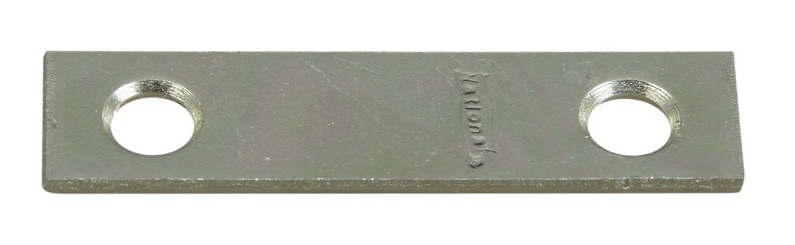
I figure I can bridge the seams with these things and some counter-sunk screws. This should force the new floor material to be on the same level as the old stuff – or at least closer.
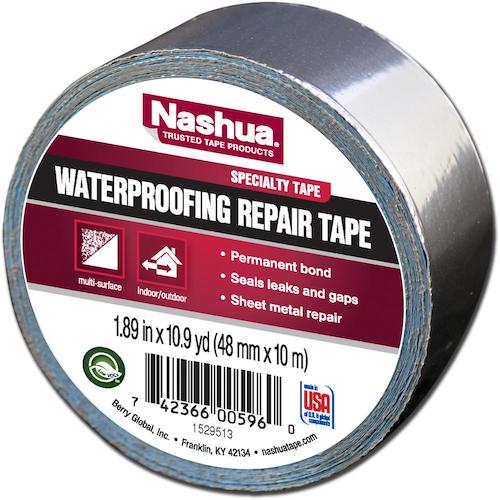
I also picked up some waterproof repair tape which is used for sealing gaps and my intention is to tape over the wood seams to keep water from getting in. Seems like it would be easier.
I went out and did the job and here’s the jist of it…
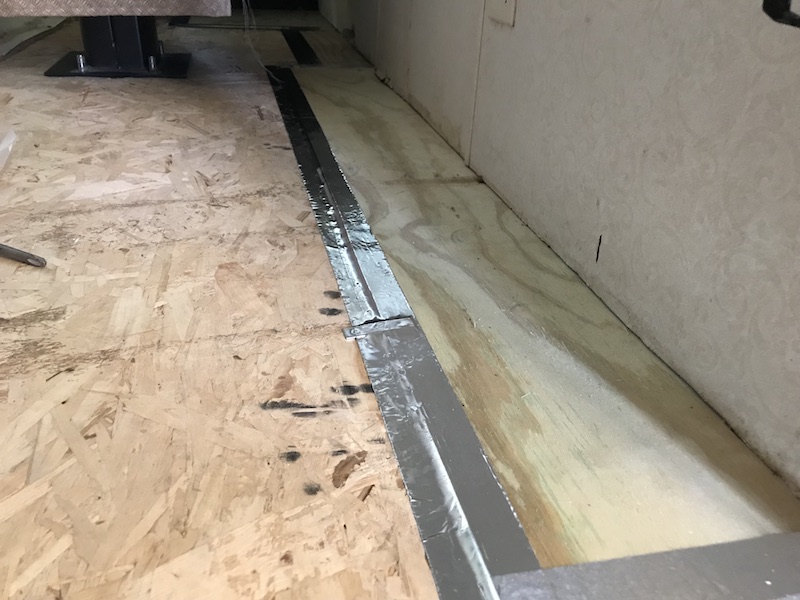
The surfaces aren’t completely level, but it’s fine. Once I put the underlayment on there and then the planks, the slight unevenness shouldn’t be noticeable.
And up front, I’m intending to install a layer of Dynamat sound dampening under the carpet as well in order to quite down the cockpit even more. That will add yet another layer, making the subfloor a non-factor.
The next phase of this project is going to have to wait, unfortunately. Come to find out, the vinyl planks we decided on was a special order product from Lowes. So, I have placed that order and I am going to need to wait several days to get it. Due to timing, the following weekend will likely be off the table for this floor project. But, we’ll pick up again soon. 🙂
Hi
Here we are May 10 … did you get your flooring yet ?
My curiosity is making a nervous wreck out of me… can’t wait…Your posts are very enjoyable..
Gotta play catchup here on the blog to show the rest, but yep, the flooring is now done. 🙂 Will show.