My Cruise Control Stopped Working! Here’s How I Fixed It (Workhorse Chassis)
My motorhome rides on a Workhorse W22 chassis. I honestly don’t know if what I’m about to say applies to other chassises. It may. You’ll need to do your own research.
I first noticed the issue while driving on a bumpy road up in Canada between Montreal and Quebec City. I went to engage the cruise control and it didn’t want to work. After a couple of attempts, it did engage.
It repeated this a few other times. In other words, most of the time it’d work fine, but it was showing symptoms of becoming problematic.
But, then on a recent trip out to Texas and back, the cruise control was no more. It wouldn’t engage at all. So, I drove from Florida to Texas and back without any cruise. And, no cruise control going down I-10 is…. special. 😉
I discovered something, though. If I held up the brake pedal with my toe or my hand, the cruise would work. The moment I let go, it’d stop.
This tells me that the cruise control is working fine. The issue is at the brake pedal. Even in the resting position, the pedal was engaged just enough to kick the cruise control off.
So, I went diggin’ in the halls of Google like most people do. And I found this little item…
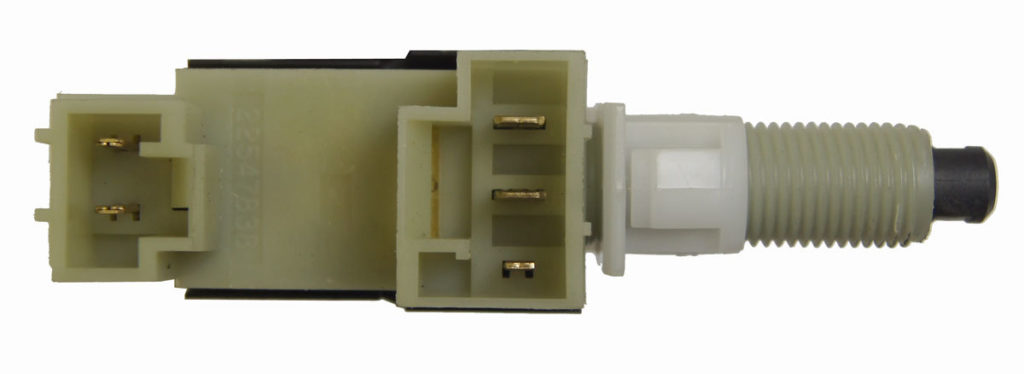
That’s a brake light switch. Or sometimes called the stop light switch. This one is specific to GM vehicles (and the Workhorse uses GM).
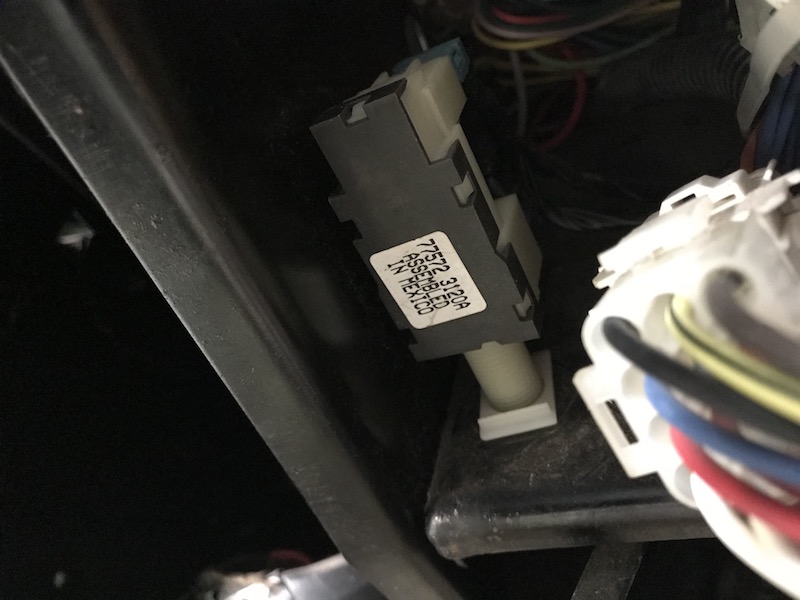
If you go up under the dashboard and look near the top of the brake pedal, you’ll see this switch mounted there with two sets of wires plugged into it. The threaded end goes through a whole in the dash and that little black switch on the end faces the brake pedal.
The way it works is that when you press the brake pedal, it presses a metal rod which goes through the firewall, engages the bell crank, which then transfers compression to your master cylinder and that stops the rig. But, on the release side of the pedal (when you’re not pressing the brakes), the pedal shaft is supposed to come up and engage that little black switch on the brake light switch. Simply by making contact, it indicates that you’re not using the brakes.
Well, as you can see with the threaded shaft on the switch, you can adjust how deep into the dash the switch is mounted. And that will control at what point the brake pedal shaft taps the switch.
So, I don’t know how it happened, but this switch came out of adjustment. My brake pedal had perhaps a quarter-inch of free play when in the top position. When it sat there, it was enough to kick off the cruise control. But, if I lifted the pedal that remaining quarter-inch, it’d hit the brake light switch and the cruise would work just fine.
So, my solution was to turn this switch a rotation or two so as to move the switch CLOSER to the brake pedal.
Ya with me here? 🙂
So, here’s what I did…
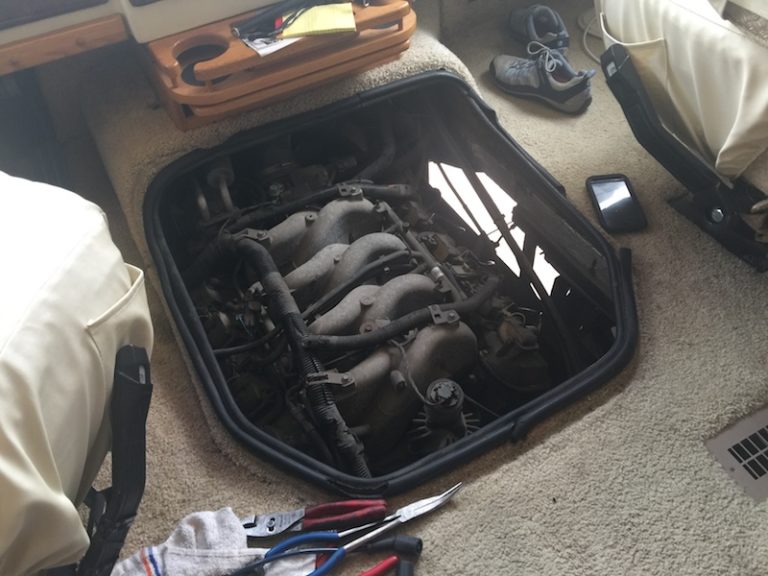
- Remove the dashboard cover so I can get access from the top. I could see the switch from below, but not with enough hand room to be able to unplug those connections and rotate the switch. So, by removing the dashboard cover (gently) and holding it back, I could come in from above.
- Remove the two plugs so that the switch is free to rotate. This takes some doing. I found it was easier with a set of pliers.
- Rotate the switch clockwise to bring it closer to the brake pedal. How much you do this will depend on how “off” it is. In my case, I rotated the switch two complete turns.
- Plug the electrical connections back in.
- Put the dashboard cover back on.
Now, you’d want to test it. It IS possible to go a little too far. The effect would be that your brake lights get stuck on. So, I started the engine and ensured the lights weren’t on. I then took the rig for a test drive and, sure enough, my cruise control worked exactly like it was supposed to.
Yay!
In my case, the fix was pretty straight-forward. There are some other scenarios that could apply in other situations.
In some cases, people have installed return springs on the brake pedal to draw it all the way to top when not in use. That would have been my next move if my simpler fix didn’t work. It was unclear to me what the points of attachment would be for the spring, however. I imagine I could have run it from the back of the pedal shaft to one of the many holes on the dashboard frame. I never got to the point of testing that theory. 🙂
Also, some people have tackled it through lubrication of the bell crank. Workhorse, in later models, installed a ZERK fitting on the bell crank to allow easy lube. In my earlier model (year 2002), there is no ZERK fitting for this. Apparently, I can have one installed or even do it myself. The point would be to ensure easy lubrication so that there’s no friction on the brake release which would keep the pedal from returning fully. Perhaps that is something I’ll look at in the future, but my brakes seem to be working fine.
Lastly, it is possible that the brake light switch simply malfunctions or is damaged. It’d be an easy replacement. Same basic procedure as above, but remove and replace. The switch can be found online anywhere from about $15 to $30.
Be sure to check your VIN to ensure right part number.
Now, when we drive out west this coming summer, my feet can rest easy on I-10. 🙂

![Which Is More Economical? An RV Trip or a Car Trip? [CASE STUDY]](https://www.happilyrv.com/wp-content/uploads/2016/04/rv-trip-cost-versus-car-768x432.jpg)

Thanks for the insights!
I will try those fixs today, a pending 2000 mile trip looms.
Thank you! This was exactly the information I and my brother in law needed.