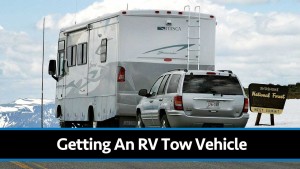
Getting An RV Tow Vehicle – Part 3. Researching and Deciding On Flat-Tow Equipment
Follow Along On Our Tow Vehicle Setup:
- Part 1: To Tow or Not To Tow?
- Part 2: Tow Dolly or Flat-Tow “4 Wheels Down”?
- Part 3. Researching and Deciding On Flat-Tow Equipment
- Part 4: Final Equipment Decisions And Purchases
- Part 5: Towing Equipment Installed… and DONE! (Photos)
 With a 2012 Honda CR-V as my future tow vehicle (or “toad”), it was now time to figure out how to prep it up for towing. After all, even though the CR-V CAN be towed on all 4 doesn’t mean it comes prepared to do so.
Here’s the parts that are needed for this:
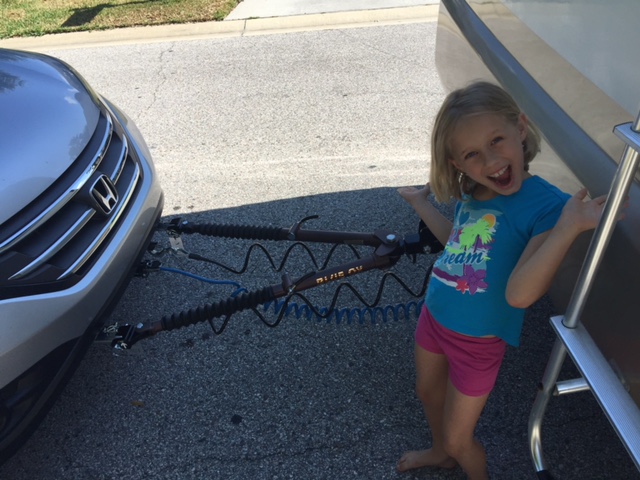
- Base Plates: These are the hooks on the front that the towbar will attach to. They are custom made for each vehicle make and are installed to attach to the chassis.
- TowBar. The actual connection between the towed vehicle and the RV.
- Brake. Provides a supplementary braking system that ties the brakes of the toad to the brakes of the RV. When you hit the brakes in the RV, the toad brakes, too. This is a legal requirement in many U.S. states, and I consider it a safety matter.
- Brakeaway Cables. Will cause the vehicle to stop itself if it somehow gets away from the motorhome. Not likely, honestly.
- Taillight wiring. So that the taillights of your toad will act like trailer lights and react to braking of the RV.
- Fuse Disconnect. Not really necessary, but is a convenience item. In some cases, you need to disconnect a fuse so that the battery isn’t drawn down during tow. This switch makes it so you don’t have to get down on your knees and pull the fuse all the time.
Let’s go through each…
#1 – Base Plates
Base plates are designed specifically for your brand of car. For instance, the plates that are made for a Jeep would not fit on my CR-V. So, you have to buy plates designed for your particular vehicle.
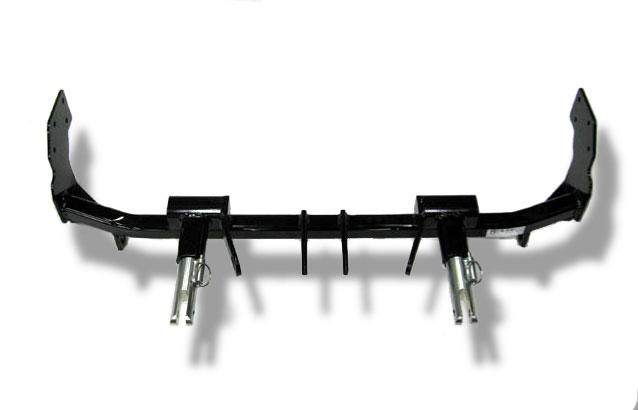
Baseplates are made by a few different manufacturers, including Blue Ox, Demco and Roadmaster. The average price for plates will run you $350-$400.
They have to be installed as well. It can be an involved process, including removal of the bumper, yada yada. I’m no expert on stuff like that, but I’m definitely going to hire it done.
As of now, I’m leaning toward the Blue Ox baseplates for my Honda. I want something that doesn’t stand out like a sore thumb when I’m driving the vehicle. Some plates stick out alot and you could ram your knee into it or something.
#2 – Tow Bar
The tow bar is perhaps the easiest component to shop for. It doesn’t require any installation on the vehicle since it is an exterior component. However, you do need to have the towbar matched up to your baseplates.
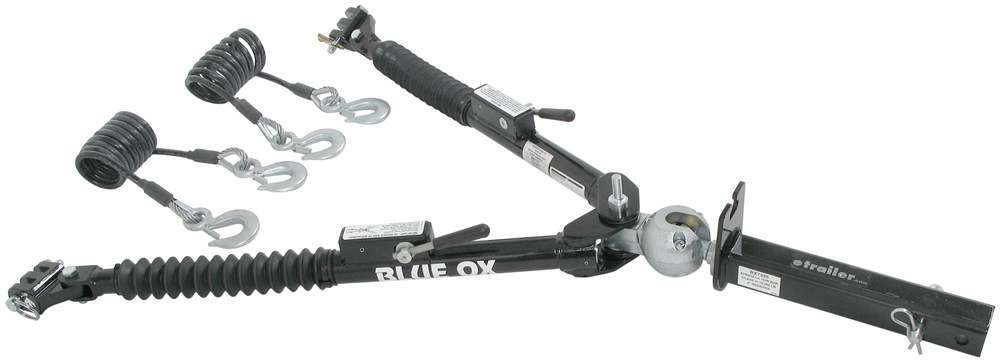
Buying a new one is most likely preferable, however you can find them used on Craigslist. If you want to save a few bucks, you can go that way. For instance, I saw a Blue Ox towbar on Craigslist for about $400 – cheaper than the $650 or so the same bar would cost new. Saving $250 is always nice. The only reservation here is the history of the towbar. For instance, did they ever try to go in reverse with it? That could cause a little damage that you wouldn’t see. Not a huge risk here, but if you want to be sure it is new and have it covered under warranty, buy new. Keep in mind, many manufacturers will recondition it for you pretty cheaply if you meet them at an RV rally or something.
For any towbar, I think it is important that it has:
- Quick disconnects
- Ability to hook/unhook even if the vehicle isn’t straight or is on an incline.
It just has to be easy.
Right now, I’m leaning toward the Blue Ox Aventa LX towbar. It has the quick-disconnects and it has a ball-in-socket design which will easily deal with uneven surfaces or vehicle being off-center.
#3 – Brake
Some people say you don’t need a brake. And technically, that’s probably correct. However, it is a legal issue in many states. The likelihood of being pulled over in an RV isn’t high, but still.
Bigger factor for me is the safety. Let’s say you have to make a quick stop at a traffic light turning yellow. That car back there is just dead weight unless it has some ability to stop itself. Your RV can do it, but it is going to lengthen your required stopping distance. With a braking system, the RV won’t even notice it.
Now, researching brakes can be confusing as hell, to be honest. At least it was to me.
They tend to come in 3 different styles:
- Surge brakes via cable. Basically, when the RV stops, the forward inertia will cause a cable to be pulled, therefore pulling on the brake pedal and stopping your car. It is a simple mechanical setup.
- Built-in systems. These systems tie into the brake system of the car, actually using the vacuum assist to stop the car. It would be no different than you sitting in the car and pressing the brake while it is running. These systems are convenient. Some systems are almost completely out of sight (under the hood) while some have a little box which you can hide under the seat.
- Portable systems. These systems are attractive because they can be moved to different vehicles easily. No install necessary. However, they sit on the floor of the car when you’re driving and literally press the pedal like your foot would. And you have to remove it from the car every time you want to drive it. It is portable, but that also means you have to take it in and out every time.
During my research, I rather quickly ruled out the portable systems. BrakeBuddy is a popular one. Thing is, I’m going to all this trouble to flat-tow rather than dolly tow specifically because I want it to be quick and easy. If I have to set up a brake every time, it kinda defeats part of my intention. There’d be this big box I have to put into the car and attach to the pedal every damn time. And do the reverse to remove it and then store that big brake box in an RV compartment when we’re using it.

Plus, I read all kinds of annoyances with these portable systems. So, I simply decided it wasn’t for me.
Next up… surge brakes.
The one that got my attention was the ReadyBrute Elite, from NSA. It is a combined towbar and surge brake all in one. Very cost effective. It attaches to the vehicle via a simple mechanical cable that you run through the engine compartment, through the firewall, and attach to the pedal. Very simple system.
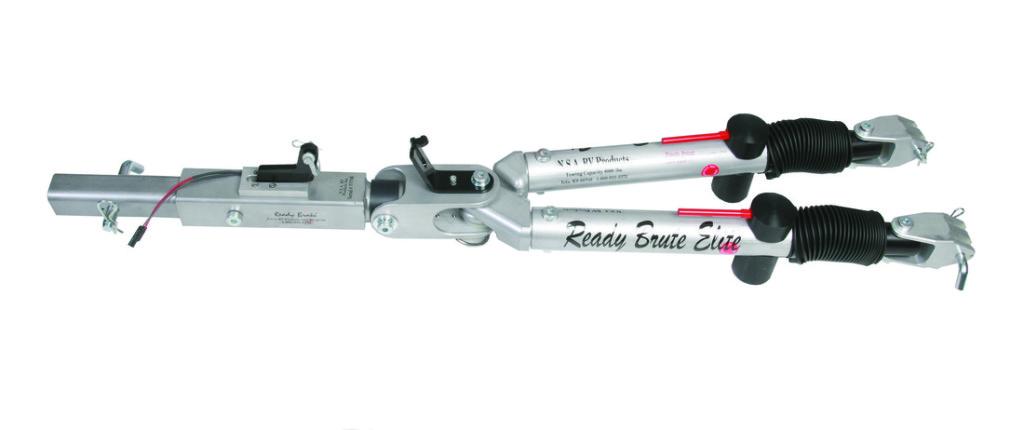
The interesting thing was that the installers I talked to were definitely less than enthused about doing it for me. 🙂 One outright told me that if I wanted to stay away from trouble, I should avoid cable brakes. The other told me they didn’t recommend this system and that it was a real pain to install on many vehicles with tight engine compartments. I imagine my CR-V is one of those. The price she quoted me to install wasn’t too far off of a built-in system, which I found surprising.
When you ask users of the ReadyBrute Elite what their thoughts are, most of them tell you they really love the system. But, I did find some who told me it gave them some trouble.
Being a cable system, anything that causes that cable to bind up a bit can result in problems. Either the brake won’t activate properly, or it’ll activate too much and drag the vehicle and cause damage. Also, apparently how well the systems works is very dependent on how well it is adjusted at the get-go. It is easy to over do it and drag your brakes. Plus, as I said, if the cable begins to bind, it would present problems. Humid environments, salty environments… they could cause a cable to bind unless you routinely check the flow of that cable and ensure it is moving freely.
So, as of now, I’m leaning away from the ReadyBrute Elite. Onto the built-in systems…
Two of the popular ones are the Invisibrake and the SMI Stay-in-Play DUO. Both systems are installed into the vehicle and become part of the car. They integrate directly into the car’s existing brake. They operate very similarly. Both seem highly convenient. Literally plug it in and turn it on… and you’re done. Its about as “install it and forget it” as you can get.
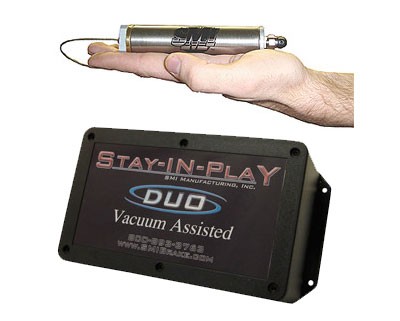
The upfront cost of these systems is about the same as the portable boxes, however it comes with installation costs as well. So, it is more expensive.
Seems to me like the best kind of system however. I’m currently leaning toward the SMI Stay-in-Play Duo.
#4 – Brakeaway Cables
Honestly, not much to say about this. They’re cables.
Whoever installs this stuff for you will gladly sell them to you.
#5 – Taillight Wiring
Once again, not much research needs to go into this. You’ll buy a wiring kit and they’ll put it in for you.
‘Nuf said.
#6 – Fuse Disconnect
You may not need this. It depends on your vehicle and your choice of braking system. From what I can tell, some systems do a little trickle charge on the battery as you go so you don’t need to worry about the fuse. But, until I talk to the installer and make the final decisions, I’m still a bit unclear on this one.
Next Steps: Install
Some of the little details here in my research process will be filled in when I decide on an installer and make the final decisions.
I live around LazyDays and Camping World, so those are always options. Honestly, though, I’m leaning away from using either of them. They’re sure to be more expensive. Plus, I’ve heard that it can take forever for LazyDays to get around to service.
I have a couple of smaller installers in the area I’m considering. So, next step is to decide and schedule.
Will update you on that part. In part 4… 🙂
Follow Along On Our Tow Vehicle Setup:
- Part 1: To Tow or Not To Tow?
- Part 2: Tow Dolly or Flat-Tow “4 Wheels Down”?
- Part 3. Researching and Deciding On Flat-Tow Equipment
- Part 4: Final Equipment Decisions And Purchases
- Part 5: Towing Equipment Installed… and DONE! (Photos)